Every triathlete that has traveled to a race knows the stress of packing up all of your fancy gear and equipment to prepare it to fly. Securing, padding, weighing, checking your packing list, checking it again…. And of course checking it 3 more times. Race day is around the corner and you’re (hopefully) about to realize the culmination of all the hard work that took you to this point.
For a lot of the gear if anything is lost or damaged there can be ways to improvise or find last minute solutions at the race location to save your big day. This definitely is not the case with, what is likely your pride and joy, your bike. An item that can easily be more expensive than your car, every bit of it adjusted to the millimeter to fit your body and riding style. Likely constructed with obscene (yet tasteful) amounts of carbon fiber, a material that simply isn’t a match for a careless baggage handler tossing it on the tarmac or stacking 50 pound bags on top of it. Add to all of this that TSA will most likely be rummaging through every delicate irreplaceable item of your steed at some point in the journey as well.
It goes without saying you can’t race a triathlon without a bike. Hmm… I guess that goes WITH saying now, but I digress… it’s critical to understand some key steps and methods you can use when preparing your bike to fly to make sure you get it to the race location in one piece with as little headache and money wasted as possible.
The simple advice goes pack each piece of your bike as if you’re packing a carton of eggs for a long trip in the cargo hold of a jet, but this easy advice to do something difficult falls short of what is actually required for a jetsetting athlete.
My advice comes from the school of hard knocks with events that led to an anxiety induced pre-race week that ended with success in getting my bike to the race destination with the thinnest of margins.
I own a standard Bikebox Alan hardcase. I’ve travelled numerous times with my last road bike in this case and have nothing but great things to say about the protection and integrity of the case. Already having earned my trust my plan was to utilize the same case with my fancy new aero bike. This leads to my advice in the title of this blog…
Always test pack your bike.
The Bikebox Alan, along with most standard hard cases require that the wheels, pedals, and handlebars be removed to allow for packing. Depending on the size and geometery of the frame the seat post may need to come off as well.
On my beloved Emonda with all brake and shifter cabling externally routed this was a breeze. After a couple trips with the bike I could break down and reassemble the bike from the case in about 10 minutes. Quick humble-brags aside, I found out this meant absolutely nothing when with my new ride.

8 days before my flight was scheduled to depart for Ironman Cozumel I decided to test pack my fancy new Trek Madone in the hardcase. During the build I had requested enough slack in the brake cables and di2 wiring to allow for the handlebars to slide off the steering tube and allow for the bike to be packed just as my Emonda has been packed so many times before. Piece of cake, right?… 10 minutes for a sanity check and back to training.
I removed the pedals with my pedal wrench and set them aside. Next was the steerer tube cap and loosening the bolts clamping the handlebars to the steerer tube. I slid the handlebars up and quickly arrived at the problem number 1. The handlebars would not slide the final 0.5 cm off the steerer tube. I tugged and wiggled as much as I could without fearing damage to my baby. As I analyzed the bike I realized even if I could get the final 0.5 cm that there likely would not be enough slack to lay the handlebars flat with the drops on either side of the top tube in my hard case. I also later found out twisting the handlebars around could result in pinching and damaging a brake line… luckily I stopped before I got to this expensive lesson.

This led to reassembling the bike and riding it to my local bike shop for my first packing consultation. As with most high-end aero bikes, Trek has very detailed specifications on cable runs and lengths. I was advised against trying to rerun longer cables to accommodate removing the stem from the steerer tube.
The new Madone comes with a 2-piece handle bar so the next thing to try was removing the handlebars from the stem and them possibly removing the brake calipers to allow for a few more inches of slack to get the bike in the case. I rode back home renewed with hope for another date with my steed and torque wrench.
This time I spent over an hour carefully removing the handlebars from the stem… Still no luck fitting in the hard case. I then loosened the stem from the steerer tube and removed the brake calipers to get every bit of slack my spaceshipesque bike had to offer. Dismantling my complex bike to this level was anxiety inducing, but I was able to rouse up a false sense of confidence to go about the task with my tool kit. After some wrestling it actually looked like the bike was going to fit!… and without a millimeter to spare.
I put the wheels in the designated locations in the lid of the case and again tried to close the top. The brakehood was impeding my deep dish 62mm carbon wheels leading me to finally realize with 7 days to my flight that my trusty hard case was simply not going to work. It was too late to ship my bike to the race and have it for race morning. Plus, I would need it to complete my assigned training plan rides leading up to the race. After contacting Bikebox Alan about purchasing an aero case that would allow the handlebars to remain intact and being assured there was no way it would be in my hands before the flight, I allowed myself a few minutes to stew in defeat. When the wallowing was complete, I promptly began posting on every forum I could and texting all my fellow triathlete friends to see what options there might be.

My internet sleuthing came up with 2 viable options. Borrow a Scicon softcase from a friend or disassemble and pack the bike in the original manufacturer box, either option requiring me to check it on my flight with me.
I decided to use the manufacturer cardboard box as a last resort. TSA loves to rummage around checked bikes and I knew they would not show my precious bike the love and care required when shoehorning it back into a box full of packing tape and foam arranged like a real-world game of Tetris. Nightmares of seeing my bike arrive piece by piece of shattered carbon down the baggage claim chute was enough to spark my determination to make the Scicon softcase work.
After picking up the softcase and getting it back to my apartment I got to work watching manufacture how-to videos to cover the basics before pulling my bike apart yet again. This case was supposed to allow for packing after only removing the wheels. This should be an absolute breeze I thought… 5 minutes until I can breathe a sigh of relief.
I removed the front wheel and fit the dropouts over the proprietary “frame protector” front axle holder, reusing my thru axle to attach the forks to the case. After I removed the rear wheel is when yet another problem reared its head… the case was designed for 130mm rear wheel spacing, whereas my Madone has 142mm spacing on account of the disc brakes. After rummaging through the various adapters and skewers that came with the bike I found a space that was supposed to extend the rear attachment 12 mm and make the case work for me.

The outer diameter of the adapter was too large for the Madone dropouts meaning that I was again at an impasse unless I wanted to risk cracking or chipping my frame in transit… I cringe even writing that sentence, obviously this was not an option.
Scicon customer support was easy to get in touch with and kind enough, but nonetheless gave me the bad news that this was the only adapter they make and therefore the case would not work for my bike in its current state.
Back to the bike shop I went with the adapter in hand to see if there was any chance I could have it custom machined to fit the Trek dropouts. With a belt sander available the mechanics went to work and in a few hours I had a new asymmetrical custom adapter that looked a far cry from its original form… and it fit like a glove into my Madone drop outs. Absolutely beauty! Time to give the soft case another go.

Front fork mounted to the case.
Rear wheel removed
Adapter slid into place.
I insert the Scicon quick release skewer into the derailleur protector cage and through the drop outs/case… too short. Designed for the 130mm spacing and not a millimeter more. My thru axle would not fit through the derailleur cage leaving my critical di2 components vulnerable to a 50lb suitcase dropping on them. My head hurt with stress and I had 4 days until my flight.
I decided to take to Amazon and throw a Hail Mary last ditch effort to get a 2-day delivery on a thru axle to quick release adapter designed for stationary trainers that just may somehow get me over this final hurdle.
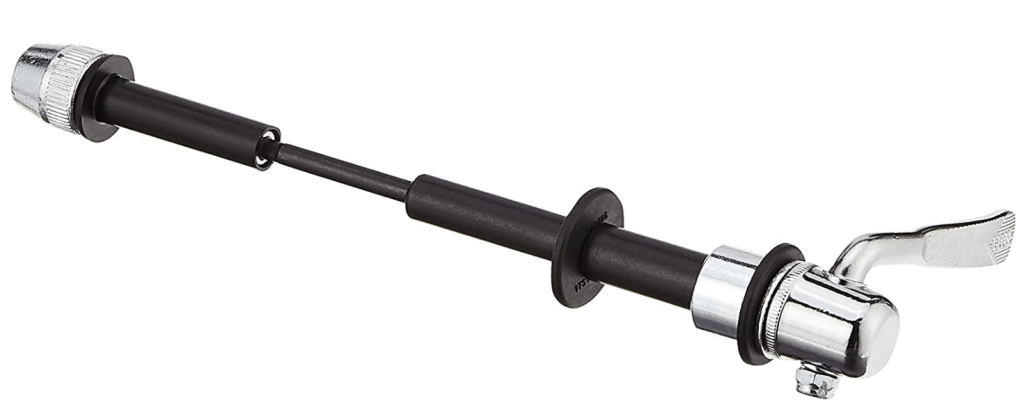
By a blind stroke of luck the part had all the necessary adapters and length required to mate my thru-axle and custom machined adapter to the case with the derailleur cage, protecting my fragile mechanicals.

Airlines will accept liability for a hard case, but most will make you sign away all your rights and your first born at the terminal when checking a soft case. Most triathletes have studied and know the airline bike baggage policy better than the people that wrote them. I arrived knowing every measured dimension of my packed bike, the exact weight, and the ins and outs of this liability policy.
Pack your bike as if it’s a crate of eggs… and that just what I did. I took a roll of foam and wrapper it over every exposed piece of my frame and wheels. I taped cardboard around my shifters for additional protection.
The coup de grace was placing bright orange “Do not double stack. No pongan nada encina de esta carga” stickers on every side of the case. (Translated in Spanish as well for good measure once she got South of the border.)
FINALLY! My bike was ready to fly!
You may be thinking this is a highly specialized event rife with user error, and you may be correct. But with enough time everyone will experience some kind of issue in packing their bike.
I know athletes who have packed their steed a hundred times in a trusted case without issue, yet end up having to leave their bike at home and frantically scramble for a replacement at their location after a seized or stripped bolt, all of which could have been avoided if a week ahead of time they had test-packed their bike.
I also would strongly recommend taking photos of all handlebar and seat positions in case further dismantling is required to allow you to restore your bike fit without much hassle at your destination.
What problems will you inevitably run into when packing your bike? I don’t know, but YOU should find out at least a week before takeoff.
UPDATE:
My Bike arrived in Florida and then in Cozumel safe and sound despite being rifled through by TSA’s finest. The Scicon case did its job well after all the headache and we are ready to race!

Leave a reply to The Land of Flowers, Coffee, and Epic Cycling Routes – Khach Me If You Can Cancel reply